
Calculate How Many Roof Vents You Need
Learn how intake and exhaust work together, what a ventilation calculation considers, and when to assess your Tampa Bay roof...

A hot attic, a damp smell, or a recurring concern about indoor comfort can all lead homeowners to ask how many roof vents they need. The useful answer is not a count of visible vent covers. It is a balanced plan for the attic, roof shape, intake openings, exhaust openings, and the actual ventilation capacity of each component.
Ventilation is part of the complete roofing system. It works alongside the roof deck, insulation, flashing, covering, and drainage details to help the attic manage heat and moisture. This guide combines the six legacy articles into one practical framework for understanding the calculation, recognizing warning signs, and knowing when a roof-specific assessment is the right next step.
Why Attic Ventilation Is a Roofing-System Issue
A roof does more than shed rain. Its layers and openings need to work together so heat and moisture are not left with no reasonable path through the attic. When air movement, insulation, roof penetrations, or water-management details are out of balance, the effects may show up inside the home, below the roof deck, or at the roof surface.
That is why adding a vent should not be treated as a stand-alone repair. A complete review considers the attic volume and floor area, the existing intake and exhaust, the roof’s geometry, and any signs of leaks or material distress. It also confirms that a ventilation change will work with the selected roofing system instead of creating a new weak point.
Heat and Moisture Need a Path
Tampa Bay sun can make attic conditions feel intense, especially when air is not moving through the space as the system intends. Warm, humid air can collect near the upper attic while cooler outside air has too little opportunity to enter lower openings. The aim is a continuous path: intake low in the roof or eaves, and exhaust high in the roof where warmer air can leave.
Moisture deserves the same attention as heat. Everyday indoor air contains water vapor, and roof leaks or failed details can introduce water from outside. A musty odor, staining, or visible corrosion is a reason to look beyond the ceiling surface and have the roof and attic evaluated. That review can separate a ventilation concern from a roof leak, insulation gap, or another condition that needs its own repair.
Ventilation Is One Part of the Attic System
Ventilation does not replace weatherproofing, repairs, or insulation. Damaged flashing, a roof leak, blocked soffits, disconnected ducts, or insulation that interferes with intake openings can change what appears to be a simple vent-count question. The first task is to understand how the attic is currently behaving and whether the roof assembly is intact.
During an attic review, homeowners can ask whether lower openings are clear, whether high exhaust is present, and whether the attic has evidence of unwanted moisture. Those questions create a better starting point than choosing a vent product before the system has been measured.

How a Roof-Vent Calculation Starts
A ventilation calculation begins with the enclosed attic area and the design requirements that apply to that home. The evaluator identifies the attic floor area, the roof and ceiling configuration, and the openings already installed. From there, the system can be specified using the net free area—the actual open area through which air can move—listed for the components being considered.
Online rules of thumb may be helpful for recognizing that a system needs attention, but they are not a substitute for a roof-specific design. Applicable building requirements, manufacturer instructions, insulation placement, roof geometry, and the exact vent products all affect the required net free area. A count based only on the visible size of a grille or ridge cover can be misleading.
Measure the Attic and Existing Openings
Start by recording the attic floor area rather than estimating from the roof’s outside footprint. A room below, an addition, a vaulted ceiling, or an attic divided by framing can all affect what is actually enclosed. The review should also note soffit, gable, ridge, roof, or mechanical vents already present and whether insulation, paint, debris, or repairs are limiting any intake opening.
This measurement work is particularly useful before roof installation or a larger reroofing project. It allows ventilation needs to be considered while the roof covering and compatible components are being planned, instead of treating airflow as an afterthought once the work has started.
Use Net Free Area, Not the Cover Size
Net free area is the meaningful number for a ventilation plan. It accounts for the actual openings in a vent after louvers, screens, baffles, and the product design reduce the apparent opening. Two components that look similar from the ground can provide different amounts of usable airflow, so the product documentation matters.
A roof professional can total the usable intake and exhaust capacity from the rated components, compare it with the plan for the attic, and explain the result in plain language. That process is more dependable than assuming one large-looking vent will supply all of the ventilation a roof needs.
A Vent Count Is Not a Universal Formula
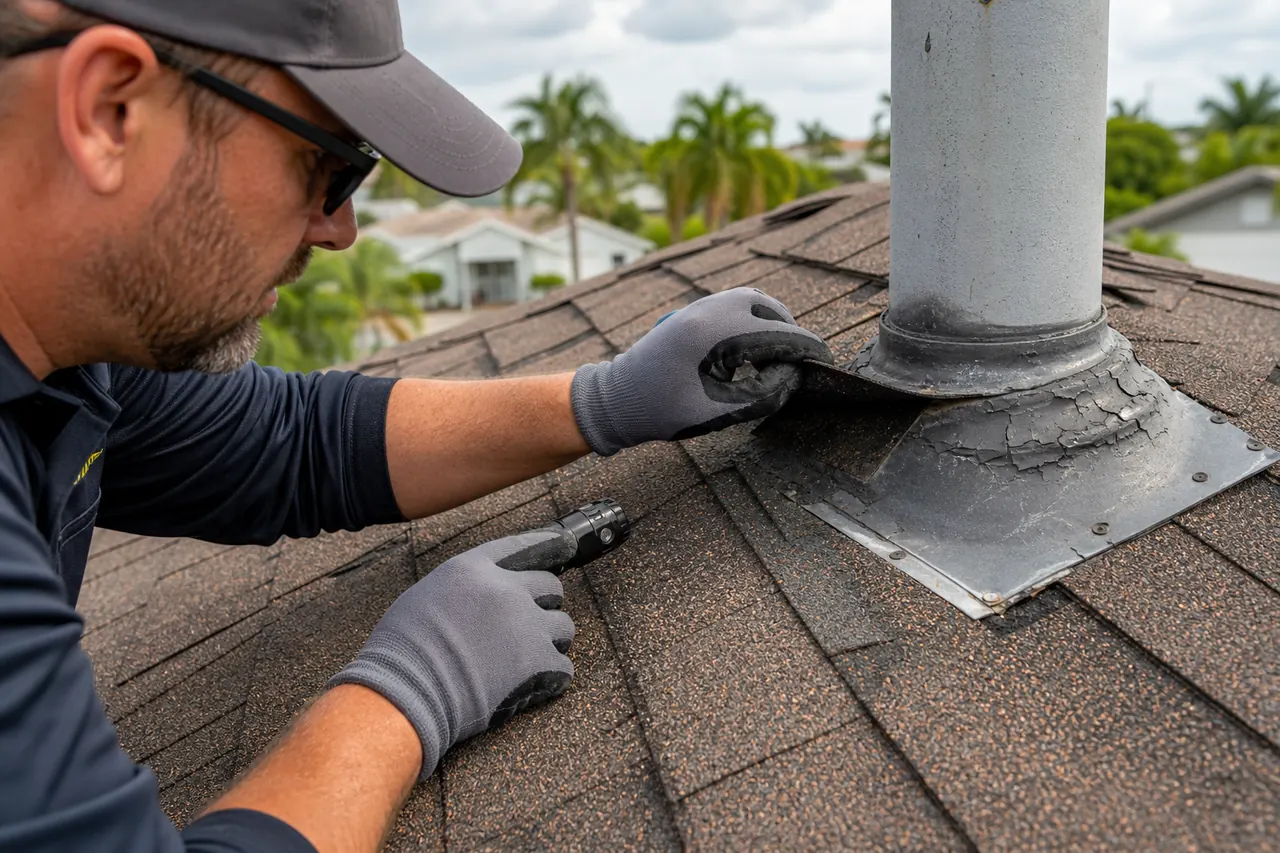
Use attic measurements and rated net free area as the starting point, then confirm the applicable code, manufacturer requirements, roof geometry, and intake-to-exhaust balance for the specific home.
Balance Intake and Exhaust
The calculation is only useful when the ventilation path is balanced. Lower intake admits outside air, while higher exhaust provides a path for warmer air and moisture to leave. If a roof has plentiful exhaust but restricted intake, the system cannot move air as intended. The opposite is also true: ample soffit openings do not solve the problem if there is no effective high exit.
Balanced does not mean every vent looks identical or every roof uses the same combination. A ridge vent, roof vent, gable vent, soffit intake, or another compatible component may be appropriate depending on the roof. The key is that the components work as one designed airflow path rather than competing with each other.
Lower Intake and Upper Exhaust Work Together
Soffit openings are often used for lower intake because they sit beneath the roof edge, where air can enter the attic. High exhaust is commonly located near the ridge or another upper area of the roof. Their locations matter as much as their quantity: airflow needs a route across the attic rather than a short path between openings placed too close together.
The details should be checked during repair work as well. A homeowner arranging a roof repair can ask whether the repair affects existing intake, exhaust, ridge cap, flashing, or roof penetrations. That conversation helps make sure a localized repair does not unintentionally compromise the broader roof system.
Roof Shape and Obstructions Change the Plan
Complex roof shapes need a closer look. Multiple ridges, hips, valleys, dormers, additions, varying attic sections, or vaulted areas may not all share the same airflow path. An evaluator should identify whether the attic is continuous, whether each section has intake and exhaust, and whether an apparently large roof has smaller isolated areas that need their own design.
An addition or roof transition can also change the plan from one plane to the next. The best calculation documents those conditions rather than applying one count to the whole address.

Condensation and Other Warning Signs
Condensation occurs when water vapor meets a surface cool enough for that vapor to become liquid water. In an attic, the result can be droplets, damp materials, staining, or a persistent musty odor. Condensation may relate to inadequate airflow, but it can also point to air leakage from the home, inadequate insulation, roof leaks, plumbing or duct issues, or more than one condition at once.
Do not assume every stain is condensation or every warm attic needs a powered vent. A roof review should look for water entry, damaged flashing, staining around penetrations, wet insulation, and evidence of poor airflow. It should also consider whether the symptoms are seasonal, localized, or connected to a recent roof repair or interior change.
Signs Your Attic May Need Attention
- A persistent musty odor, visible mold, damp insulation, or moisture on attic surfaces.
- Brown ceiling stains, recurring paint damage, or visible corrosion around roof components.
- Unusually hot upstairs rooms, changing comfort levels, or concerns about HVAC performance.
- Blocked, covered, damaged, or missing soffit and roof ventilation components.
- Lifted shingles, worn flashing, or a recent storm event that could have affected the roof assembly.
Start With the Cause, Not the Symptom
A warning sign is a reason to investigate, not proof of a single diagnosis. For example, a brown spot could be a roof leak, an issue near a penetration, a plumbing concern, or moisture condensing where air and insulation are not working together. The repair should match the cause so the same symptom does not return after a new vent or surface repair.
If a recent storm is part of the timeline, an evaluation can help document roof conditions before assuming ventilation alone is the answer. The same principle applies after hail or wind exposure, when the roof system should be reviewed for damage that may be contributing to the issue.
When Power-Assisted Vents May Be Considered
A power-assisted vent uses a motorized fan to move air. It may be considered when an assessment shows that the attic configuration and the passive system need a mechanical solution. It is not an automatic upgrade for every hot attic, and it does not remove the need for adequate intake or sound roof, insulation, and air-sealing details.
The decision should follow a diagnosis, not lead it. Before specifying a powered component, confirm the condition of the passive intake and exhaust, whether the attic has isolated sections, how the roof is constructed, and whether moisture is entering from another source. The goal is to solve the airflow problem without introducing an incompatible or unnecessary system.
Passive Design Is the Starting Point
A well-planned passive system uses the roof’s geometry and the natural movement of air through lower intake and higher exhaust. That simple concept still needs careful execution: the openings must be clear, their net free area must be understood, and the components must be compatible with the roof covering and details around them.
That is why adding exhaust without checking intake can disappoint, and why a fan cannot correct a roof leak or an attic section with no usable air path. The best first question is whether the existing system is complete and functioning as intended.
Decide After an Assessment
A professional assessment can identify when a passive solution should be corrected, when mechanical assistance is worth considering, and when another roof or attic condition needs priority. That is more useful than treating a power-assisted vent as a universal answer to a warm second floor or a condensation concern.
For example, a homeowner planning a new metal roof should discuss ventilation at the same time as the roofing system, flashings, underlayment, and roof configuration. That complete-system review supports an informed recommendation instead of a one-size-fits-all add-on.
Get a Roof-Specific Ventilation Plan
The right number of roof vents comes from a clear picture of the home: attic area, existing openings, rated net free area, roof shape, component locations, and the conditions the roof is already showing. Once those facts are documented, a homeowner can understand whether the next step is to clear intake, improve a balanced passive design, repair a roofing issue, or evaluate another option.
This approach is just as valuable for a new roof as it is for a repair. Homeowners planning roof work can include ventilation in the scope from the beginning, while homeowners seeing a new symptom can make sure the diagnosis reaches the real cause.
What a Ventilation Assessment Should Include
- Attic-area measurement and identification of separate or isolated attic sections.
- A review of existing intake and exhaust openings, including whether they are clear and connected by an airflow path.
- Rated net free area for the specific components instead of a count based only on visible vent size.
- Inspection for roof leaks, flashing concerns, condensation clues, and insulation or air-sealing conditions that may affect the attic.
- A written explanation of the recommended solution and why it fits the roof rather than a generic vent-count rule.
Talk Through the Next Step
If your attic has heat, moisture, or ventilation concerns, bring the observations you have noticed to the inspection. Photos of staining, the timing of the problem, and any recent roof or interior work can help guide the review and show whether a repair and ventilation adjustment should be planned together.
A roofing professional can explain the conditions found in the attic, identify any repair that should be coordinated with the ventilation plan, and turn the measurement and inspection findings into a clear scope for the home.
Need a ventilation plan?
Get a Roof-Specific Ventilation Assessment
Request a free roofing estimate from Affordable Roofing Systems to discuss your attic conditions, roof details, and the next step for your home.
Schedule a free roofing estimate